Content
- 1 Celery stalk - perennial or annual
- 2 How celery grows
- 3 How to grow stalked celery from seed for seedlings
- 4 How to plant stalked celery in open ground
- 5 How to care for stalked celery outdoors
- 6 How to bleach stalked celery
- 7 Harvesting
- 8 Reproduction
- 9 Pests and diseases of stalked celery
- 10 What to do with stalk celery for the winter
- 11 Conclusion
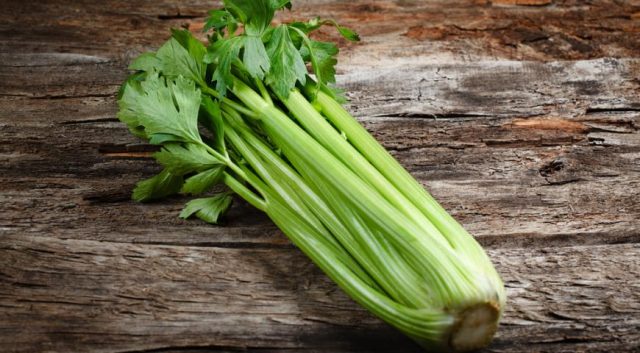
Fragrant or Fragrant Celery is a type of herbaceous plant that belongs to the genus Celery from the Umbrella family. It is a food and medicinal crop, it can be root, leaf or petiole. Botanically, the varieties are very similar to each other, the way they are grown is different. Caring for petiolate celery in the open field is easier than for root celery, but it takes more time to dilute the leaf.
Celery stalk - perennial or annual
Smelly Celery is a plant with a two-year life cycle. In the first year, it forms a dense root crop without voids inside and a large rosette of leaves on large petioles. On the second, it releases a peduncle up to 1 m high and sets seeds. Harvesting - root crops, petioles and spicy leaves is carried out in the year of planting, the next they receive their own planting material.
Celery used to be grown as a medicinal plant, now its medicinal properties have faded into the background, the culture is recognized as a vegetable and is used in the cuisines of different nations. In the post-Soviet space, root crops have gained the greatest popularity, while in Europe, petiole varieties are usually bought.
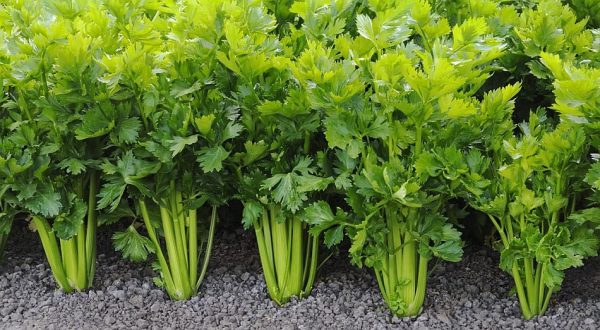
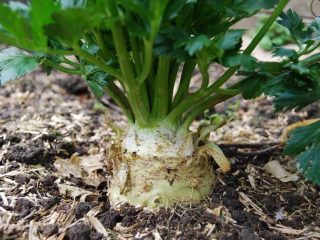
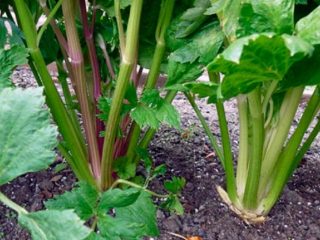
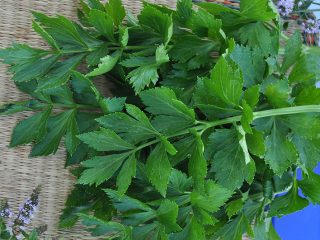
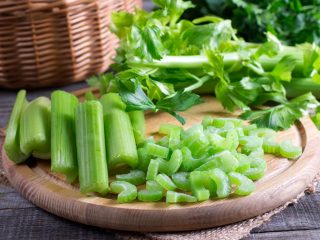
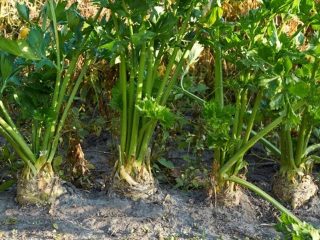
Stem celery has a fibrous root system and forms a small, poorly visible root vegetable under the numerous lateral branches. He builds up a large rosette, a larger volume of which is occupied not by leaves, but by petioles. Their color can be green, lettuce, pink or reddish, the width is from 2 to 4 cm with a thickness of no more than 1 cm.In classic varieties, the stems are bleached before harvesting (depriving of light access) in order to remove bitterness and make them tender; do not need it.
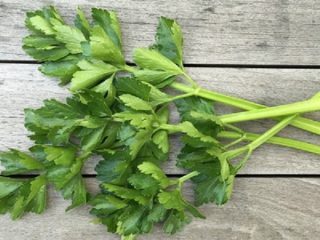
Typically, each leaf rosette consists of 15-20 erect leaves. But there are varieties that give up to 40 branches, sometimes semi-spreading. The stems are wide at the bottom, tapering at the ends and ending in triangular pinnately dissected dark green leaves. The petioles are hollow inside, ribbed, with a pronounced groove on the part facing the center of the rosette. Their length depends not only on the variety, but also on the cultivation technique of stalk celery, and ranges from 22 to 50 cm.
Seeds are small achenes that remain viable for no more than 4 years (guaranteed - 1-2 years). A peduncle about a meter long appears in the second year of life.
How celery grows
Celery is a moisture-loving culture that tolerates short-term temperature drops well. Seedlings can withstand frost at -5 ° С, though not for long. The most cold-resistant varieties are with red petioles.
Leaf celery has the shortest growing season and can be sown directly into the ground. The root crop will take about 200 days to form.It is grown exclusively through seedlings, and in the North-West it is rarely planted in open ground.
Petiolate celery occupies an intermediate position - from the moment of emergence to harvesting, 80-180 days pass for different varieties. To obtain marketable stems, seeds can be sown in the ground, but it is more rational to first grow seedlings.
The optimum temperature for growing vegetable celery is 12-20 ° C. And although it tolerates a temporary cold snap well, if the thermometer does not reach 10 ° C for a long time, premature shooting may begin.
How to grow stalked celery from seed for seedlings
There is nothing difficult in growing celery seedlings. Its seedlings are much more hardy than those of tomatoes or peppers, and these crops are planted and dived annually by millions of gardeners.
Landing dates
Seeds of stalked celery are sown for seedlings from late February to mid-March. Most varieties have a rather long growing season, and the stems must have time to acquire a presentation before the cold weather. First, the root and leaves develop, the petioles are extended in length, and only then they increase the mass. This takes a lot of time, albeit not so much as for the formation of a root crop.
Tank and soil preparation
Celery seeds can be sown in ordinary wooden seedling boxes or directly in separate plastic cups with holes for water outflow.
Used containers are well washed with a brush, rinsed and soaked in a strong solution of potassium permanganate. This will kill most of the germs and bacteria that can cause disease in the seedlings.
To grow stalked celery from seeds, you can take ordinary purchased seedling soil. The substrate can be prepared independently by mixing equal parts of garden soil and well-rotted humus with the addition of sand. Only it needs to be sifted through a sieve to remove all lumps, pebbles and plant residues - the soil for seedlings should be homogeneous and permeable to water and air.
Seed preparation
Celery seeds are very small - 1 g contains about 800 pieces. In addition, they quickly lose their germination. So, you need to use your own planting material as early as possible, and in the store you should pay attention to the expiration date.
The seeds of umbrella crops sprout for a long time - this is due to the presence of essential oils in them. That is why in the southern regions, crops such as carrots are sown dry for the winter and are not afraid that they will germinate at the wrong time.
Without preparation, celery seeds hatch for more than 20 days, the seedlings will be uneven and weak. There are many ways to speed up their germination and improve the quality of seedlings, here is one of them:
- The seeds are soaked for 3 days in warm water, which is changed twice a day.
- A piece of white cloth is placed in a shallow, wide container. Swollen seeds are spread on it in a thin layer and moistened with water.
- The container is kept at room temperature for 7-10 days, not forgetting to moisturize the fabric.
During this time, the seeds should hatch - it will be clearly visible on the white fabric. They need to be planted immediately for seedlings.
To make celery seeds sprout faster, the following methods are often used:
- soaking in special preparations sold in seed shops;
- keeping in hot water (no more than 60 °) for 30 minutes.
Planting stalked celery for seedlings
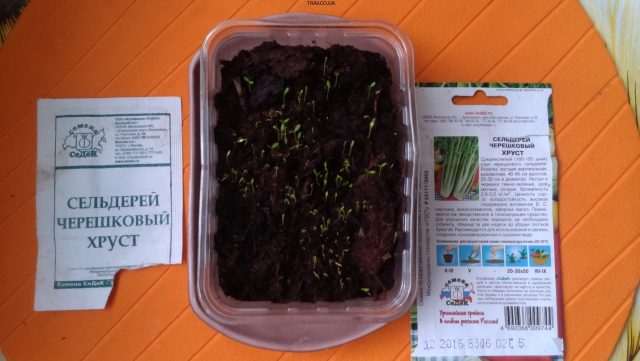
Seeds can be sown not only in planting boxes filled with moist seedling substrate, but also in greenhouses. The soil is compacted, shallow furrows are made at a distance of 5-8 cm from each other. Seeds are laid out in them at the rate of 0.5 g per 1 sq. m and sprayed from a household spray bottle.
If the planting material did not germinate, but was soaked in hot water or a stimulant, you can do it easier.Snow is poured into a prepared box with a thin layer, leveled, furrows are drawn and seeds are sown in them. Then they will definitely not be washed out and will not fall into the ground during watering.
Sowing can be done in separate cups with several seeds each. Then they do not have to dive, you just need to cut off weak shoots with nail scissors, leaving the strongest one.
Containers with seeds are covered with glass or transparent film and placed on a light windowsill or illuminated shelves. The shelter is removed after germination.
Caring for stalked celery seedlings
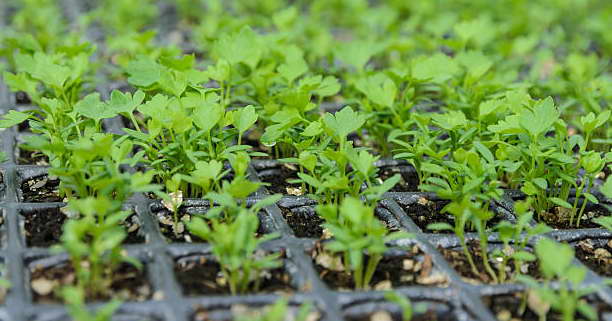
When the petiole celery seeds hatch, the containers are placed for a week in a bright room with a temperature of 10-12 ° C - this will prevent the seedlings from pulling out. Then the seedlings are transferred to a warmer place, providing fresh air and good lighting.
It is necessary to moisten stalked celery carefully - boxes from a household spray bottle, and cups - with a teaspoon, from which water is poured not on the ground, but along the walls.
In the phase of 2-3 non-standing leaves, the seedlings are dived into separate cups with a lower hole or special cassettes. In this case, the sprouts of petiolate celery are buried in the ground by cotyledon leaves, and the root, if it is longer than 6-7 cm, is shortened by 1/3.
The ideal temperature for stalked celery seedlings is 16-20 ° C. During the day, it should not exceed 25 ° C, at night - 18 ° C. For the seedlings located on the loggia or veranda, a temperature of 5 ° C is considered unacceptable. It stops growing and with a large the likelihood can get sick with a black leg or lie down. The room should have a relative humidity of 60-70% and good ventilation.
The soil should be constantly moist, but not wet. 10-15 days before planting, seedlings are fed with full complex fertilizer, diluted 2 times more than recommended in the instructions.
How to plant stalked celery in open ground
About two months after emergence, celery seedlings are ready to be transplanted into the ground. By this time, it should have at least 4-5 true leaves.
Landing dates
Seedlings of stalked celery are planted in the ground in a cabbage field, depending on the region - at the end of May or beginning of June. Even if a decrease in temperature occurs at this time, it is not scary. Celery withstands the cold well, the main thing is that the seedlings have time to take root and start a new leaf. In southern regions, stalked celery can be planted earlier.
Planting site and soil preparation
You can grow stalked celery in the garden after potatoes, cabbage, beets, cucumbers, zucchini, tomatoes, pumpkin. Before planting seedlings, they manage to harvest early radish, spinach or salad in the garden.
Petiole celery prefers loose, fertile soils with a neutral reaction. The garden bed is dug up from the fall onto the bayonet of a shovel. For each square meter, at least 4-5 kg of rotted manure is applied. In the spring, before planting seedlings, shallow loosening is carried out and special fertilizers for root crops are added according to the instructions, or a glass of ash and a tablespoon of double superphosphate per square meter.
Acidic soils are brought back to normal by adding lime or dolomite flour, and it is better to do this in the fall, and not before planting celery. Dense soils will already be better from humus, but if necessary, you can add sand - for spring loosening or directly into each hole when planting.
When growing stalked celery in the country, you need to choose a flat, well-lit area. Ridges are arranged on areas prone to locking - although the culture is hygrophilous, it does not tolerate waterlogging, and even more so, stagnant water.
Preparation of planting material
Petiole celery intended for outdoor cultivation needs to be hardened. About a week before the scheduled date, the cups are put in boxes and taken out into the street during the day. Five of them are taken indoors at night. 2 days before disembarkation, the seedlings are stopped to be brought into the house, leaving them outside around the clock.
On the eve of transfer to the open ground, celery is watered, but not abundantly, but so that the earthen ball is slightly damp.
Planting stalked celery in the ground
Growing and caring for stalked celery begins with transplanting it into open ground. For a crop to produce a good harvest, the plants must be free-standing and full of sun all day. Seedlings of stalked celery are planted on the beds in rows 40-70 cm apart from each other.The distance between the bushes should be at least 40-50 cm.
Some gardeners practice stalk celery growing in shallow trenches. This is partly justified - it will be easier to shade it when it comes time to bleach the petioles. But the bushes should receive enough sun, therefore, the trenches should be wide and directed from south to north. Otherwise, there will be nothing to bleach.
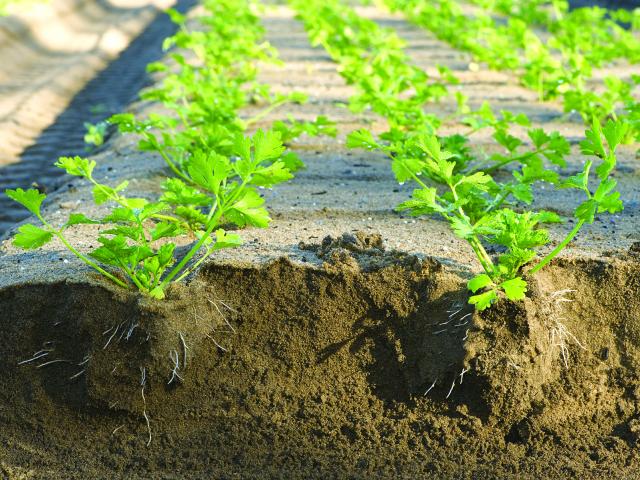
The seedlings are planted a little deeper than they grew in cups or cassettes, but so that the growing point remains on the surface of the soil. Care must be taken that it is not covered with soil.
The planted seedlings of stalked celery are watered abundantly. You do not need to mulch the garden - you will have to loosen it often.
How to care for stalked celery outdoors
If a strong cold snap is expected or the petiole seedlings did not have time to take root, the bed is covered with agrofibre or lutrastil. At night, you can replace them with newspapers, only the edges need to be fixed so that the wind does not blow away.
How to water
When growing and caring for stalk celery, one of the main agricultural activities is watering. Without this, the petioles will not be able to relieve the bitterness of any bleaching, and they will not reach a decent size.
Celery is a moisture-loving culture. You need to water it often and in large quantities. If the soil is as recommended - permeable to air and moisture, there should be no stagnation of water and diseases associated with this. After each watering or rain, the aisles are loosened.
How to feed
It is unrealistic to grow high-quality stalk celery without frequent feeding. The first time it is fertilized with a full mineral complex 15-20 days after planting the seedlings. Further feeding is given weekly after watering. If you use chemistry for this, not a healthy tasty plant will grow, but something that cannot be eaten without harm to health.
Therefore, after the first mineral feeding, celery is fertilized with an infusion of herbs, diluted with water in a ratio of 1: 3 every week. Twice a month, add a tablespoon of superphosphate to a bucket of water. At least a liter of solution is poured onto one bush.
How to bleach stalked celery
Outdoor bleaching of stalked celery is an operation designed to block the access of light to the stalks. It helps to remove bitterness and make the product more tender. If bleaching is neglected, the stalks will be tough and taste like the leaves.
To bleach celery, the easiest way to do it is to cover it with earth as soon as it reaches a height of 30 cm. Only leaves should remain in the light. The procedure is repeated every two weeks.
Many do not associate with the cultivation of stalk celery because they do not want to cover it with earth. Gardeners know that it is necessary to wash the soil out of the bosom of each petiole separately, it takes a lot of time. But there are other ways to bleach celery stalks:
- put boards or plywood on both sides of the row;
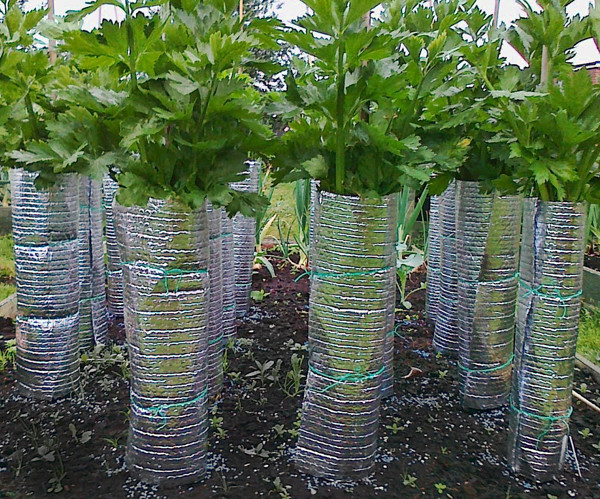
- wrap the bushes with a dark cloth, thick paper or several layers of newspapers, and pull off with an elastic band;
- use completely rotted tyrsu or sawdust for hilling;
- cover the rows with nutshells, tree bark, if there are enough of them.
Before bleaching the celery stalks, you need to cut off all the thin stalks growing outside the bush. The leaves must remain free - if you block their access to light, the plant will stop developing and may deteriorate. There should be no gap between the surface of the soil and the material covering the petioles.
It is impossible to use fresh wood residues for bleaching the stems - tyrsu or sawdust, fallen leaves, straw. Celery will be watered abundantly while it is in the ground, these materials will begin to rot and generate heat, which is unacceptable.
Harvesting
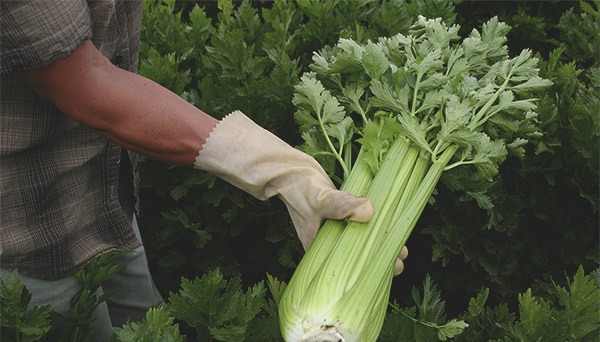
Stalked celery varieties are ready for harvest at different times. Usually the self-bleaching ones ripen first. Sockets intended for long-term fresh storage must be removed from the garden before the onset of frost. Celery that has come under the influence of negative temperatures is suitable for food, but it does not lie well.
Classic varieties with white petioles are stored best and longest. The bushes are carefully dug up by the roots, transferred to a cellar or basement, and buried in wet sand or peat. At a temperature of 4 to 6 ° C and a humidity of 85-90%, petiole celery will not only be stored all winter, but will also release new leaves.
Reproduction
Celery is propagated by seeds. The best plants are chosen as mother plants, carefully dug out before the onset of frost, the leaves are cut into a cone, and stored in plastic bags in the cellar or basement.
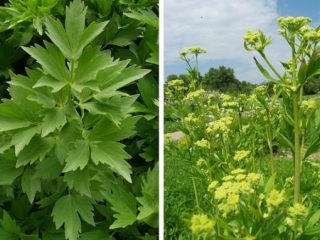
In the second year, the celery root is planted in the garden to obtain seeds. First, sparse greenery appears, then a high, up to 1 m arrow. Flowering begins 2 months after planting the root crop, and lasts about three weeks.
From the moment the celery mother plant is planted to the collection of seeds, 140-150 days should pass, by which time they should change color from green to greenish-purple. The seeds are dosed under a canopy or in a ventilated area and threshed.
In the Northwest, they may not have enough time to mature in the ground. It is recommended to pinch the tip of the flower arrow when enough testes are formed on it - each plant is capable of producing 20-30 g of seeds. This is more than enough to provide yourself, neighbors and acquaintances with planting material.
Pests and diseases of stalked celery
Leaf and petiole celery, due to the high content of essential oils, rarely get sick and are moderately affected by pests. The greatest danger to the culture is posed by overflow and stagnation of water in the root area, they are the main cause of rot. Most often they affect the growth point and the stem.
Among other diseases of stalked celery, it should be noted:
- bacterial leaf spot;
- black leg;
- viral mosaic.
Celery pests:
- slugs and snails;
- scoops;
- carrot flies.
Proper agricultural techniques will help prevent diseases and the appearance of pests:
- careful selection of the landing site;
- crop rotation;
- pre-planting soil preparation;
- timely loosening of the soil and weeding weeds;
- correct watering;
- if necessary, crop thinning.
What to do with stalk celery for the winter
You can store stalked celery fresh for up to three months in a ventilated basement or cellar at a temperature of 4-6 ° C and a humidity of 85-90%. Washed and packed in plastic bags, it can sit for up to 30 days in the vegetable section of the refrigerator. Pieces of stems will be stored in the freezer for about a year.
Petiole celery can be cut into pieces and dried. At the same time, its taste will be very different from fresh or frozen. Salads are prepared with celery, salted, squeezed and frozen juice.
Conclusion
Caring for stalked celery in the open field is difficult to call easy. But by planting a crop on their own, gardeners can control the growing conditions and feed it with organic fertilizers. This is the only way to guarantee that a tasty and healthy product will appear on the table, and not a set of chemical elements.
